|
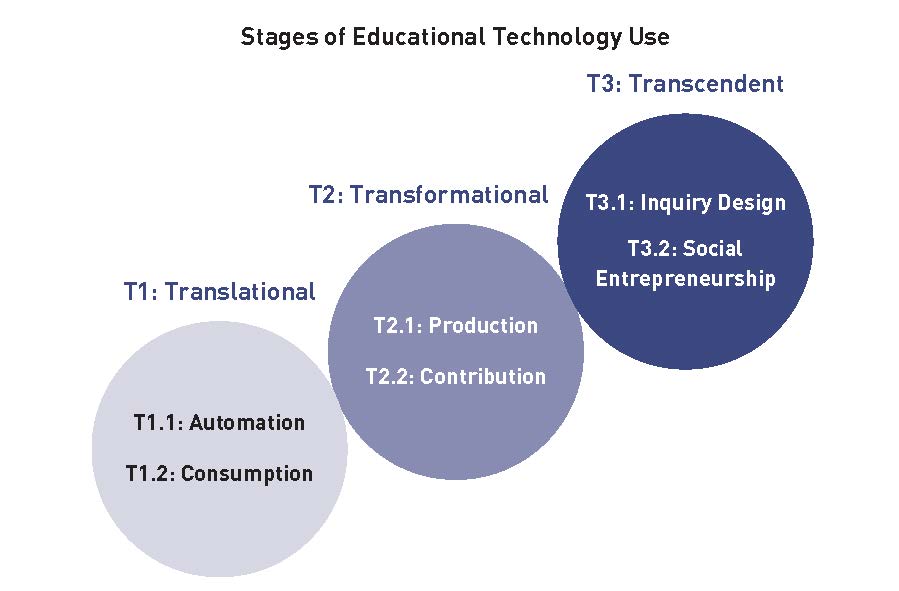
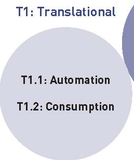
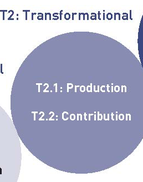
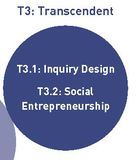
There are many different models floating around that are suggested to be used in education. You should use this one because it develops student agency; use this one because it increases productivity; use this one because it will help with digital technologies. All models have both positives and negatives to it's use. You need to look at each model carefully to figure out if it is right for you, your students and your classroom.
Check out this slide deck that was used to help crowd source information on the T3 model at the #SYD19 Google Innovator Academy (thanks Anthony Speranza for setting it up). It shares with you some ideas on how each of the stages can be implemented and used in your classroom with brief explanations. 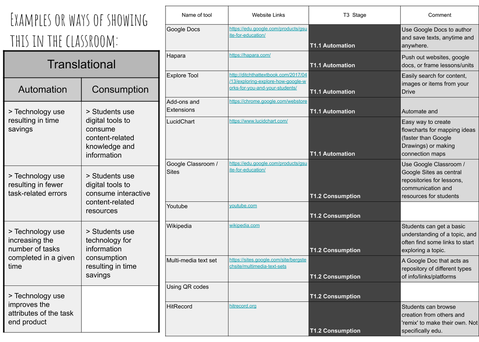
0 Comments
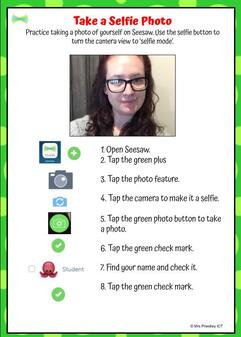
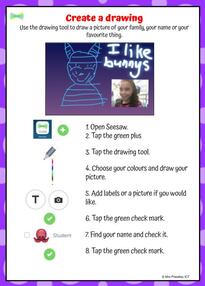
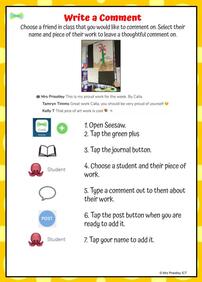
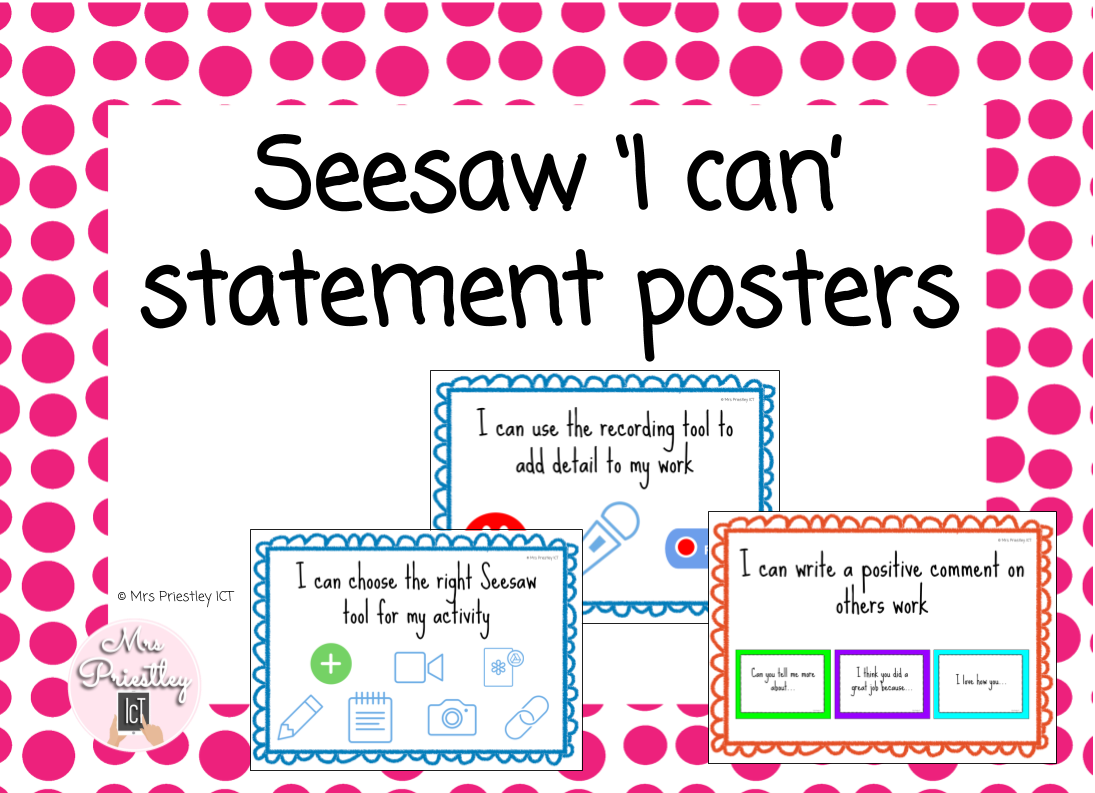
Seesaw already has some great getting started guidelines that take teachers and students through a series of lessons to unpack each tool when beginning with Seesaw. Find the guides here. I took those guides, and created some task cards that can align with those so students can learn about the Seesaw tools, follow specific instructions when using the tools to become confident users of Seesaw.
These task cards are free to download and use for your students. There are seven in total, that work through using the main tools when starting out: taking a photo, video, creating a drawing, writing note and writing a comment. Download it from my teachers pay teachers store link here, or download the pdf below. Check out my other Seesaw task cards also.
Build a word
NZ$2.50
Build a word This resource is great for young students to use to build words with letter tiles. This resource comes with three different variations: -letter tiles -letters tiles, endings and middle sounds -letter tiles, endings and blends/digraphs Assign these to students using google apps via classroom, give your students the selected slide or all three to use to make their words. Seesaw getting started task card
NZ$0.00
Seesaw 'Getting Started' Task Cards These task cards are great for using alongside Seesaw to implement into your classroom practice. These can be given to students to follow while they are working through the Seesaw 'Getting Started' guides >> https://help.seesaw.me/hc/en-us/articles/205565209-Getting-Started-Guides These task cards include: -take a photo -take a selfie photo -create a drawing -take a video -use the microphone -write a note -write a comment Use these to help your students practice the different tools when learning all about them. Request a selfie - seesaw
NZ$0.00
Request a Selfie! A resource to help remind your children to take a picture of any work they are proud of! Print both the sheets out, laminate and attach the small cameras to pegs, clips or paper clips. Children can take a small camera clip and place it on their work when they are done. Seesaw task cards - maths
NZ$4.00
Seesaw Maths Task Cards Use these in your maths rotations or activities! Instructions are listed for the students to follow using Seesaw on an ipad. Task cards included: Counting to 100 Days in school Number of the day Problem Solving Skip counting Seesaw task cards - reading
NZ$4.00
Seesaw Reading Task Cards Use these in your reading rotations or activities! Instructions are listed for the students to follow using Seesaw on an ipad. Task cards included: Book Summary Blend of the week Book review Recognising adjectives Character description Recognising blends Recognising opposites Recognising rhyming words Rime of the week Sequencing events Seesaw task cards - writing
NZ$4.00
Seesaw Writing Task Cards Use these in your writing rotations or activities. Instructions are listed for the students to follow using Seesaw on an ipad. This bundle also includes exemplars and templates to go alongside the writing task cards to be used in the new Seesaw 'activities' section. These are different to my usual task cards. To use the templates, you need to export the one you want as a JPEG file, upload it as an 'activity' for your students to use. Instructions on how to do this are in the file. Task cards included: -write a letter -high frequency words -spelling words -write a story -instruction sheet for how to export to seesaw activity -write a card -card example sheet -card template -write a letter -letter example sheet -letter template -write a story -story example sheet -story template -write a postcard -postcard example sheet -postcard template -write a letter -letter template -letter example sheet -writing checklist Seesaw task cards - ESOL
NZ$4.00
Seesaw ESOL Task Cards These Seesaw task cards are perfect for students new to English. They have instructions, picture prompts and basic activities to get students to explore language while using Seesaw. These are for use of Seesaw on an ipad. Task cards included are: -downloading instructions -my school (photo) -my school (drawing) -my friends (photo) -my friends (drawing) -my family -favourite animal -favourite food -my body parts (drawing) -my body parts (photo) -what is the weather? -fruit salad -fruit salad activity sheet -how do you feel? -how do you feel? activity sheet -this is me -this is me activity sheet -seasons -seasons activity sheet -shopping cart -shopping cart activity sheet Seesaw task cards - Maths #2
NZ$4.00
Seesaw Maths Task Cards #2 These are my second set of Seesaw Maths Task Cards. These task cards include an activity on the left hand side for students to complete alongside the task card instructions. The instructions on the right clearly show the steps for students to take to achieve the learning activity. These task cards include: addition problem solving subtraction problem solving division problem solving multiplication problem solving compare number sets fill in the numbers (10) fill in the numbers (20) number bonds Eye Spy with my little eye - two versions
NZ$5.00
Eye spy with my little eye This resource is a great activity to find objects as a time saver or activity for your students. There are lots of the objects ranging from A-Z that are scattered around the page. There are also three versions of the eye spy: -Find the objects (10 pages) -Find the objects beginning with the sound (A-Z) -Find the objects beginning with the sound (A-Z) with object clues to be used as wipe sheets This resource comes in two parts:
40 Ways to use Seesaw in your classroom (ebook)
NZ$0.00
40 Ways to use Seesaw in your classroom (ebook) Seesaw is a fantastic digital learning tool that allows students to showcase what they are learning at school. It is a fantastic platform for student engagement, creating work that expresses who they are! Seesaw has tools for creation within one app, allowing activity creation to be streamlined, easily accessible by your students and easily documented. This book brings together ideas and examples of 40 ways you can use Seesaw in your classroom! Hopefully these leave you inspired! The pdf contains links to activities and templates you can use in your classroom. You can also download this on apple ibooks too. This ebook contains 42 pages. Seesaw Cheat Sheets
NZ$0.00
Seesaw cheat sheets This resource pdf contains all of my Seesaw cheat sheets. Each made to help teachers, parents and students navigate around specific Seesaw tools. These are scattered around my website and Google Drive; but I thought it would be better to put them into one easy to download bundle. This bundle contains 23 cheat sheets:
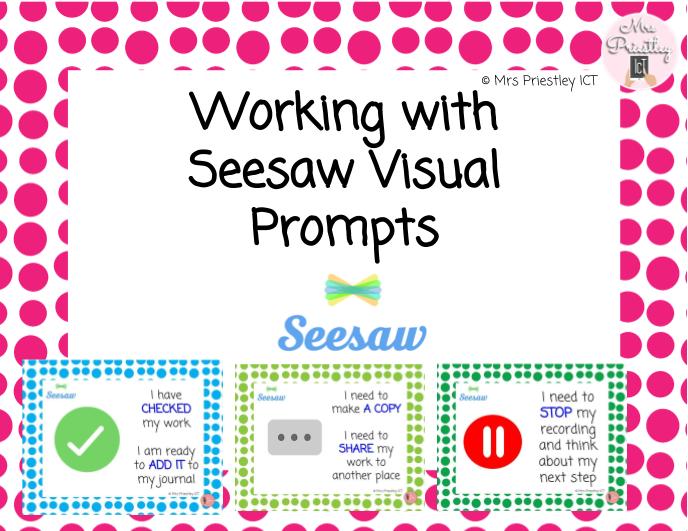
Seesaw Visual Prompts
NZ$0.00
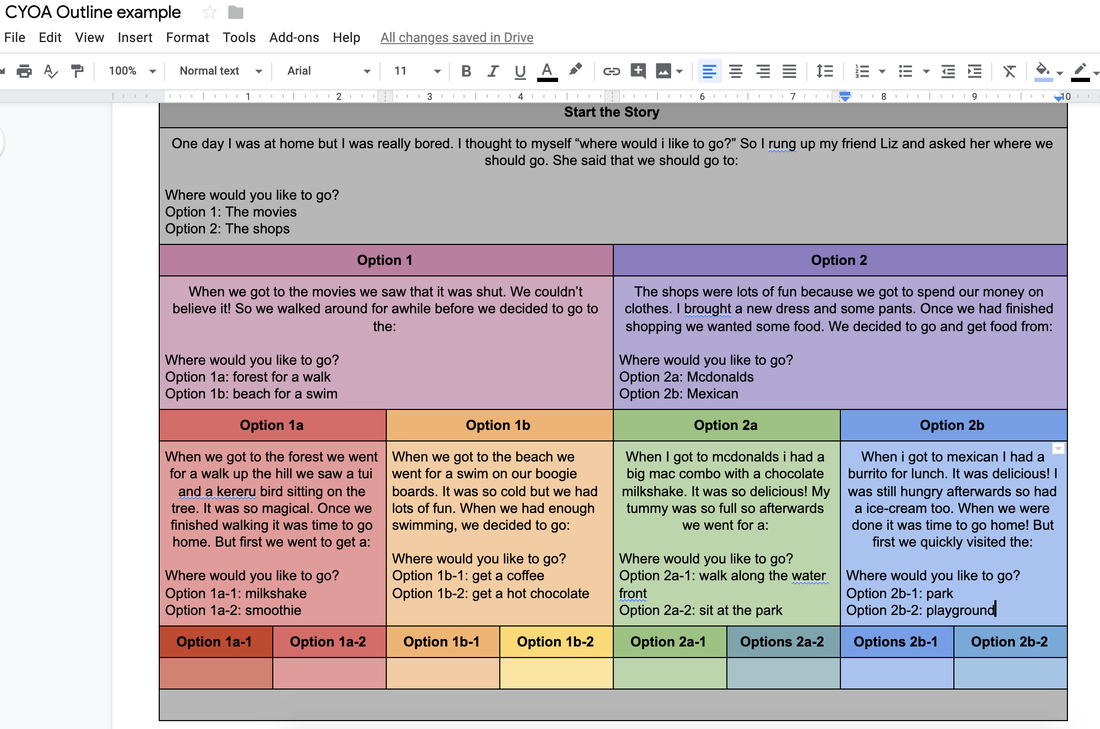
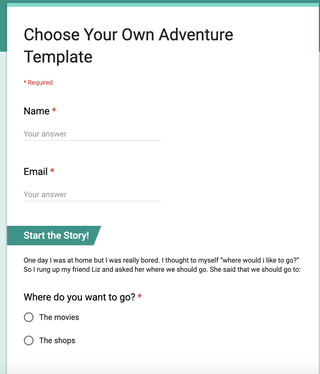
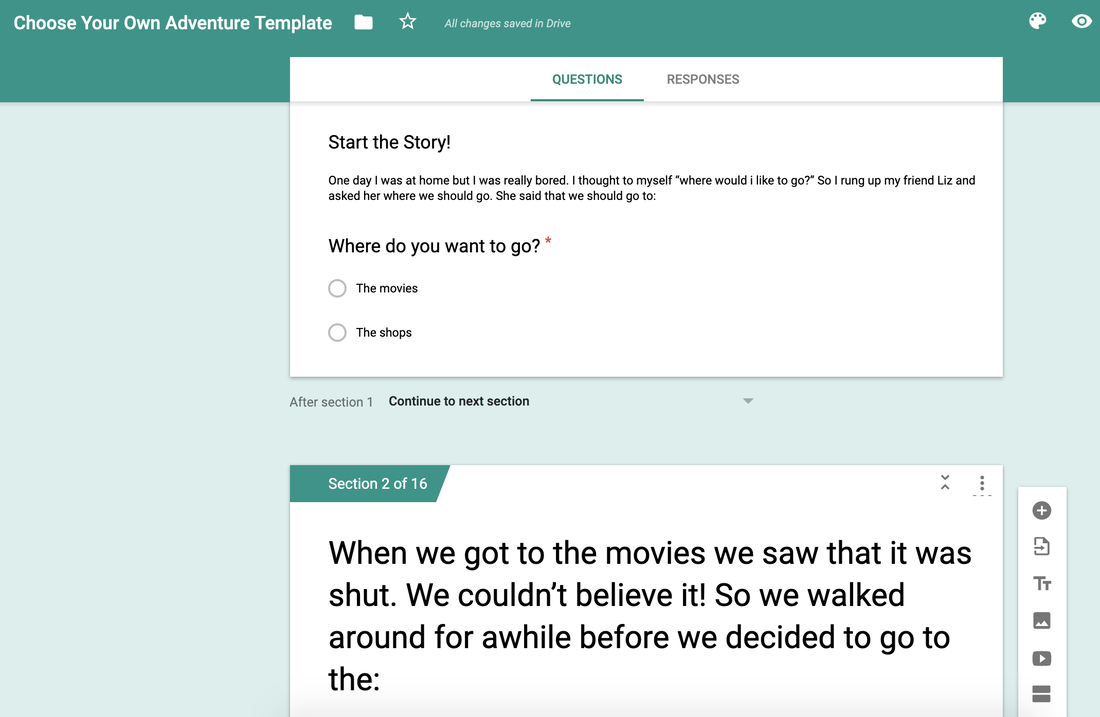
Seesaw Visual Prompts These prompts are perfect for setting up your Seesaw space in the classroom. Each prompt has a different Seesaw target being explained so your students know what it is for. The visual prompts include: -share button -drawing -add file -link -note -photo -video -camera roll -green check -blog -comment -like -make a copy -microphone -pause -recording -turn image -text label -add button Print these out, laminate and create a wall display for your class! 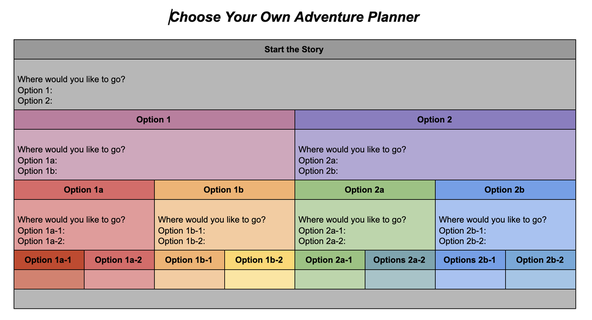 Choose your own adventure stories are a great way to get students to create their own literacy outcomes and Google apps successfully in class. I have used this once before with my students but love this idea - with aim to use it more in the future.
Once done, students simply copy the information in their google docs over to the google form template. This is easy to do as it notes which part of your story would go in which section by the 'option 1' or 'option 2' heading. Students simply follow through the options as they go through the story. To check out the planning has gone, simply click on preview and it will show you what the story will look like.
This activity is a great way to get students to use digital technologies and ICT in the classroom in a meaningful way to create a great outcome. These templates will help you complete this learning activity and guide your students to complete a choose your own adventure story!
To see an example story, click here to view my practice one! Thanks to Mari Venturino and Mr Davola for the links to the ISTE resources and templates.
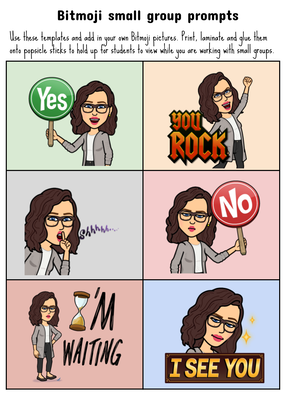
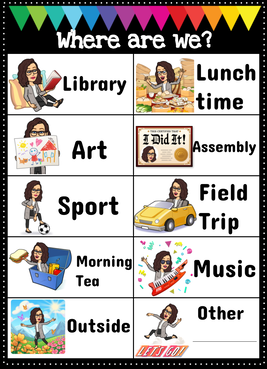
There are loads of ways to use Bitmoji in your resources with some of my more popular ones being shared below in todays sunday spotlight! Simply go to the pdf to download, click on the link to make a copy and add your own Bitmoji's instead! Simply, fun and will add that little bit more excitement to what you are doing!
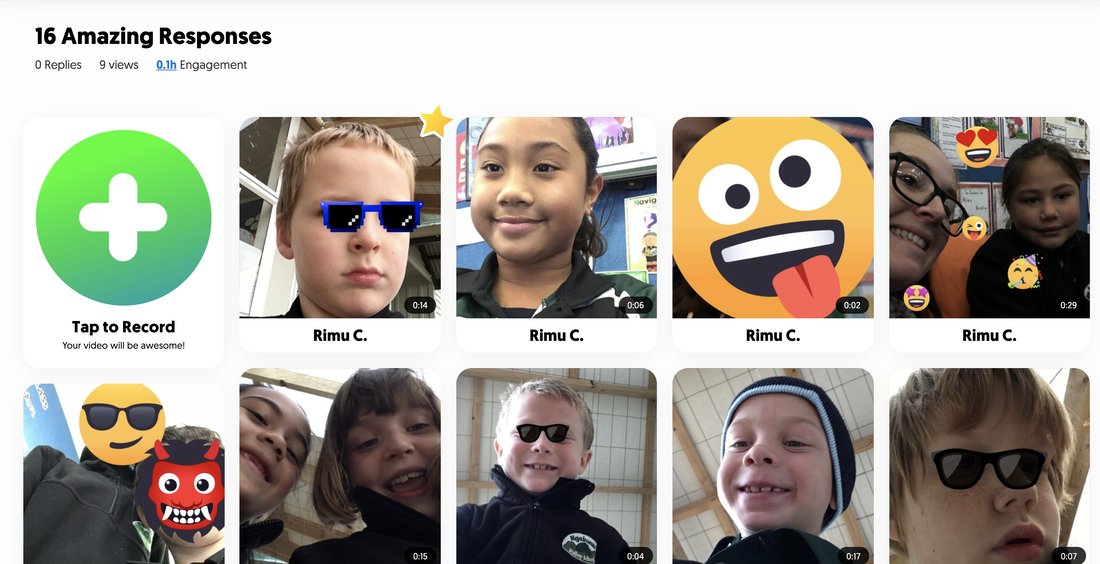
Today we used Flipgrid in class to share our thoughts about what we think excellence is. We have been unpacking what we think excellence is and how we can show that in our learning. Students got to record little videos about what they think it is and how they could show it.
Many students were really scared to record their videos but worked really hard to achieve their learning. Flipgrid is free to use and can be used in any year level classrooms! Check out this video example of one of my students talking about excellence. Seesaw is my go-to favourite app! I love everything about Seesaw and have worked hard over the last few years to make many resources that teachers and students can use alongside Seesaw! Check them all out below, with links, downloads and freebies you can use in your classroom today!
All resources are able to be downloaded and used by students and teachers across the world. These are free to access on the above links. Please keep credit links on each resource and thank you to those who have helped create aspects of the resources.
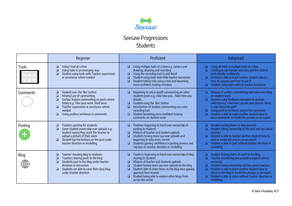
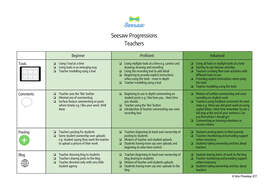
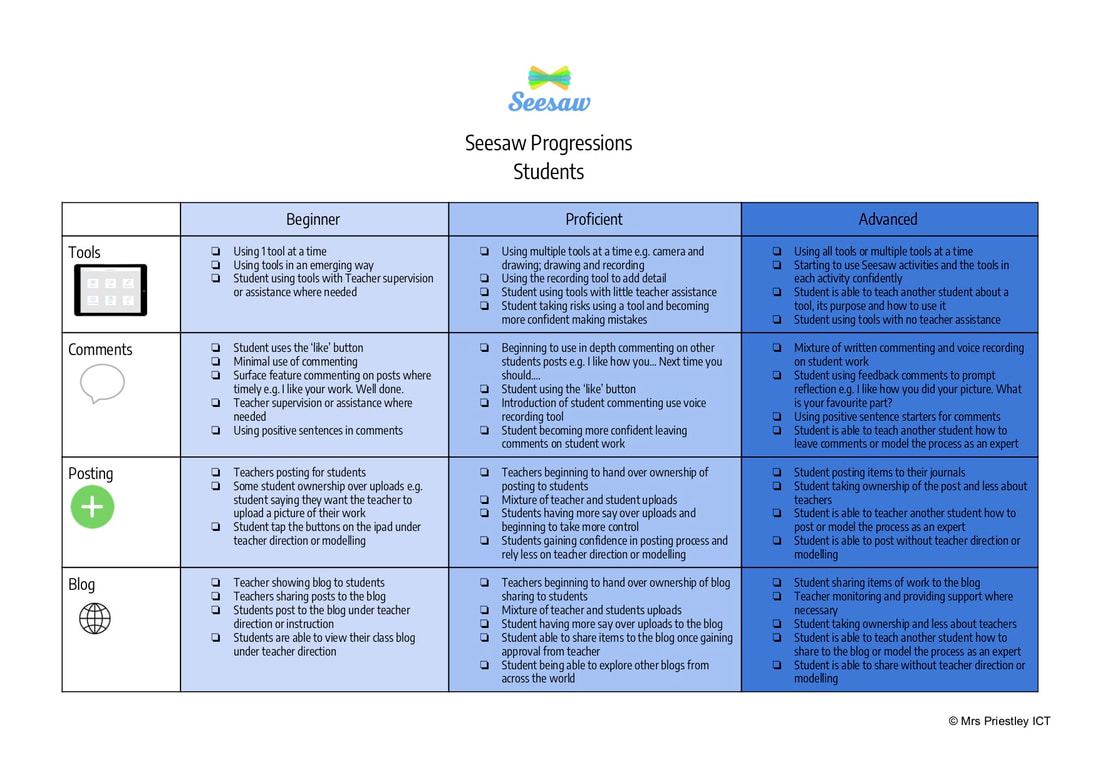
Please email info@mrspriestleyict.com if you have any questions about any of the Seesaw resources shared above. This year I was working on implementing Seesaw with students and teachers and really wanted to set up some progressions to help make the implementation or use easier. The aim of these progressions were to show each level of user that a student and teacher could be with links to tools, comments, posting and blog. They work through three levels of progressions that students and teachers could be: beginner, proficient and advanced. The best thing about these progressions is they are easily able to be used for both students and teachers. These could be printed off and displayed in the classroom and be referred to whilst students are using them. For teachers, these could be displayed in the staff room and be used as a form of reflection of assessment. Download the pdfs of both below or click the links for online access.
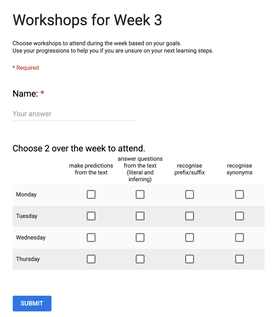
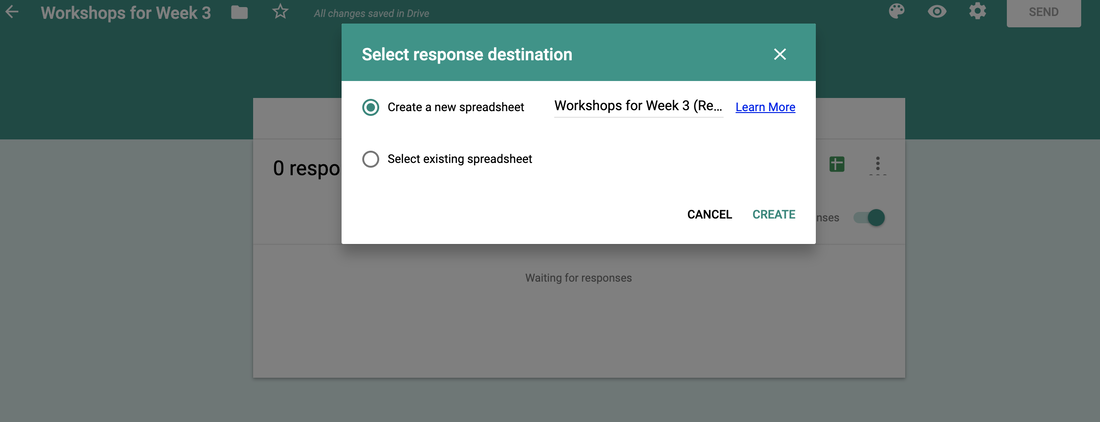
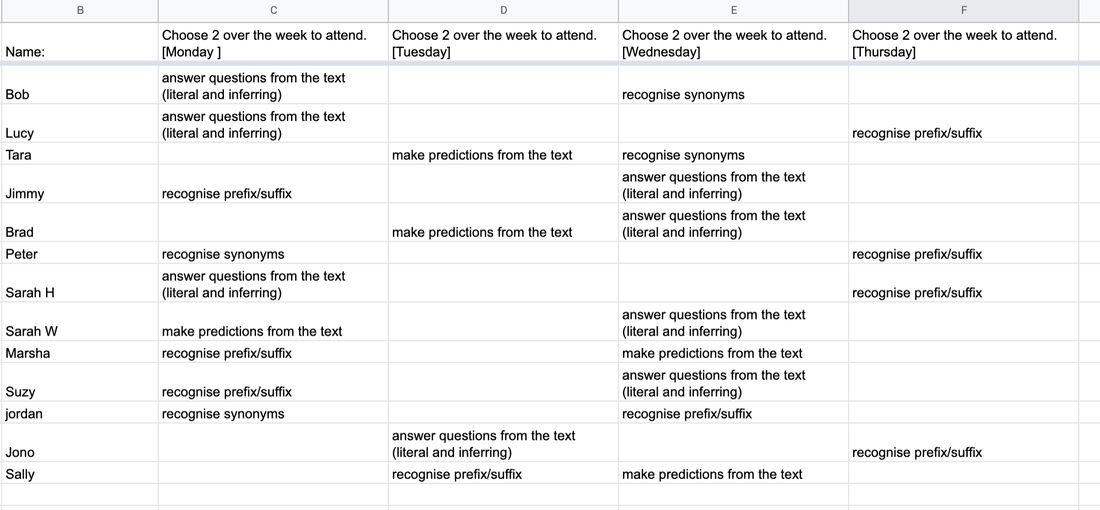
Of course you can make the sign up google form as easy or as complicated as you would like. You would then generate the google form to populate into a sheets tracking grid so you can see who will be coming on which day. This is what you can print out for students to attend, or make it into a pretty graph! Check out this example to see how it works >> http://bit.ly/workshopformsexample
 So here it is! My new pdf ebook (soon to come to itunes for download) sharing 8 engaging ways to use technology in the classroom. And by 8, it is WAY more than 8! This pdf ebook is jam packed with ideas that cover 8 topics that can have technology integrated within it effectively. The areas that are covered in this ebook are: -share the learning -gather feedback or student voice -gamify learning -get creative -interact with learning -collaboration -project based learning -be our guest Within each chapter, it unpacks what it means and then shares some apps, ideas and activities that can be used to show this area in the classroom. This pdf ebook is FREE to download so get it now!!!!
 Wow, I can not believe I am sharing this project finally with you all! This has been a long time coming, especially since coming back from the Sydney academy has brought about so many problems and set backs.
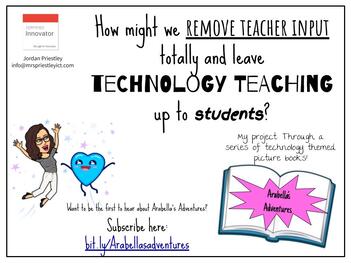
But never fear - we have got lift off in making this project a success! Arabella's Adventures! A series of technology themed picture books targeting specific digital skills and learning opportunities for teachers and students. A way of removing teacher input and leaving the technology teaching up to students! The aim with these books is for students to learn key skills on their own, but with reinforcement of follow up activities. I have nothing to share yet, but going to be working on my prototype over the next 3 months! I can not wait to share this with you all. Want to know more and be the first to hear about Arabella's Adventures? Subscribe here >> bit.ly/Arabellasadventures 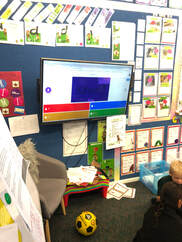 I always love using technology in engaging ways throughout all my lessons. One great app that integrates devices in a collaborative yet exciting way is Kahoot! Kahoot is a hands on, engaging and interactive app/website that provides game based quizzes for students to play. The teacher (or student) sets up the game and students join using a pin. They can play in individual mode or team mode. Students can choose a nickname or team name and are ready to play!
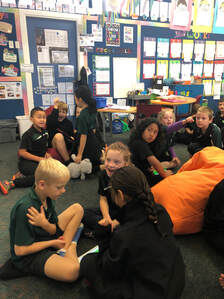
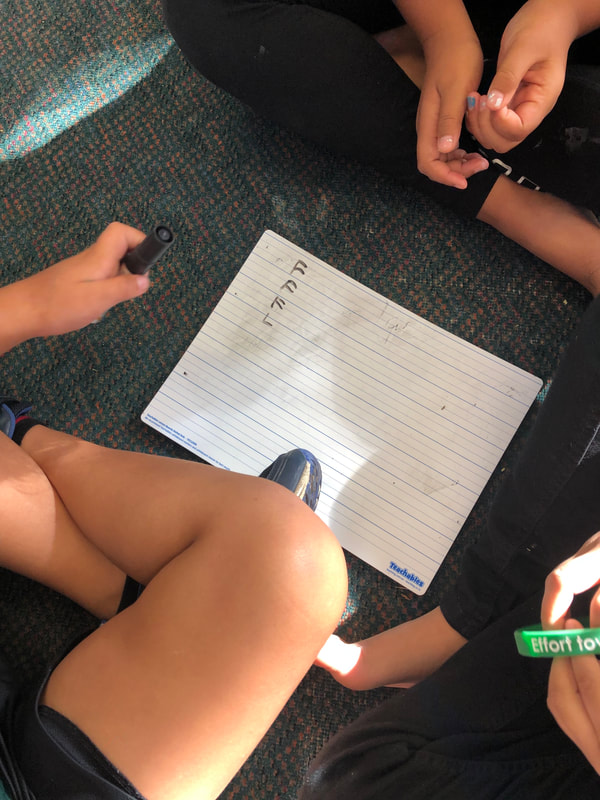
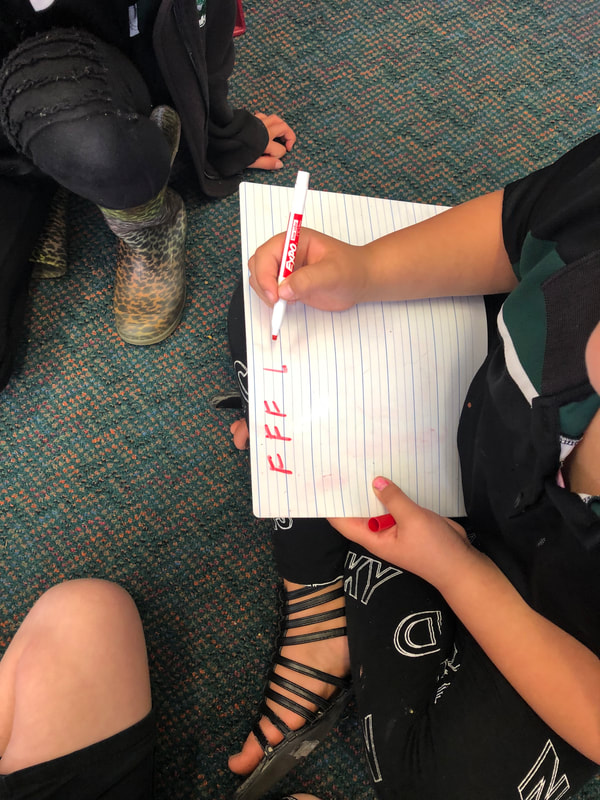
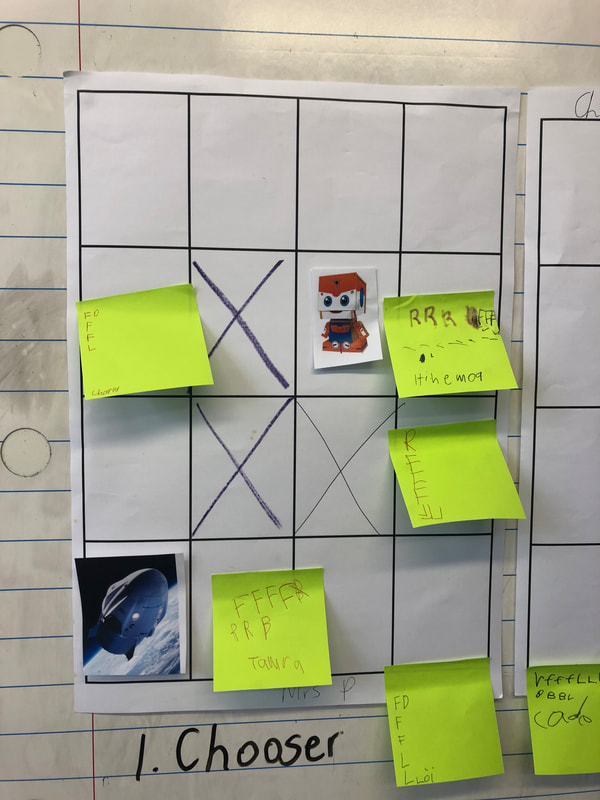
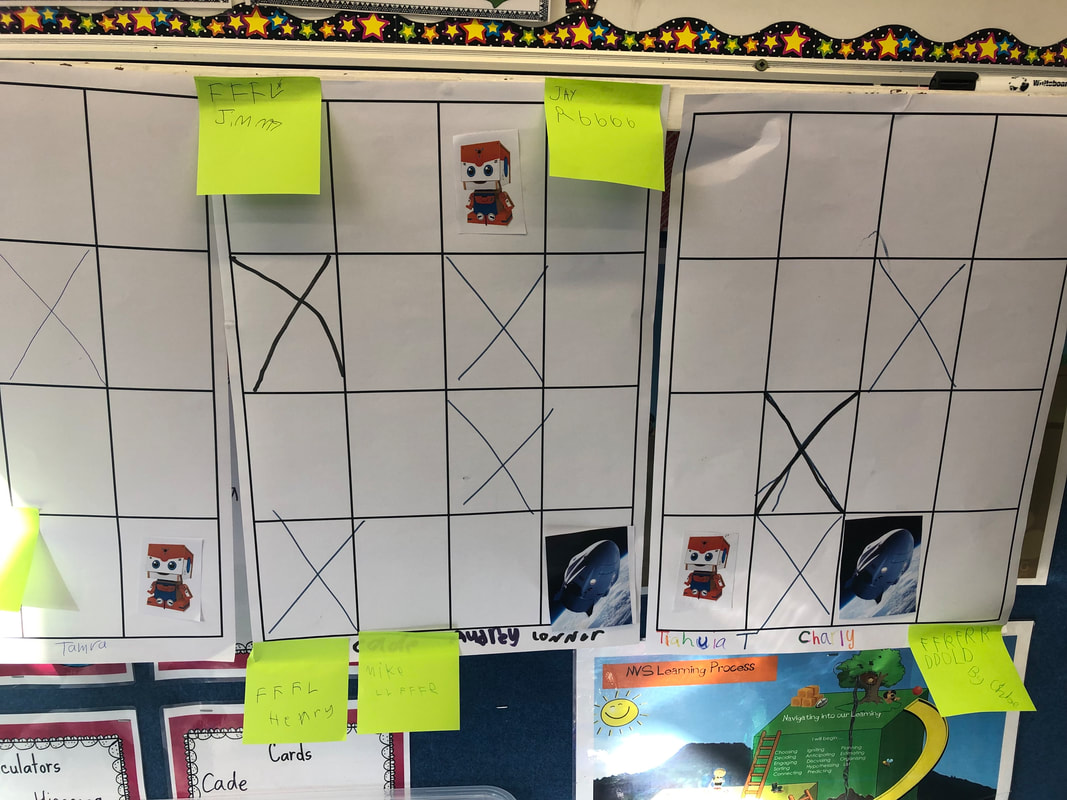
For my students, they only need to be using computational thinking in non-computerised learning outcomes. So this means without using technology or devices in the learning. Of course you can use them, but as my students had never heard the term 'coding' or computational thinking before we went and unpacked these in basic activities. My students were so engaged in the learning activity! We have been learning how to 'think like a futurist' and had a robot arrive in our classroom that has been prompting us to think of futuristic type activities. That is why there is a cute little robot in our activity. So how did we start? First we obviously unpacked the language that we would be using (directional positions) and then identified what our left and right were. This was the hard part as so many students were confused over which was their actual left! We then started with whole class learning with computational thinking, giving instructions to get our robot from his beginning position to his spaceship. This was great discussion to begin with as we had lots of confusion over left and right again. Check out the video below of our first inital discussion prompts! Once we had a few practices, I then introduced 'space rocks' - parts of the board that our robot can't go on or through to add some difficulty. This really made students think about what they needed to do and where they could go. We continued to work on problems in groups with students taking turns being the designer and the coder. Moving the robot and spaceship around the board in their own positions to create their own algorithms. This was the best part as students were able to do their own thing! They then had to write the instructions down on their whiteboards for each of their designer or coder problems. Check out this quick video of these group members explaining their work! Once we had finished our group work, we moved onto creating our own individual boards with the robot, spaceship and spacerocks. We created a success criteria for what they needed and how to present it, ready for our learning presentations this week with our families! Can't wait to share our finished products with you once we have completed them this week!
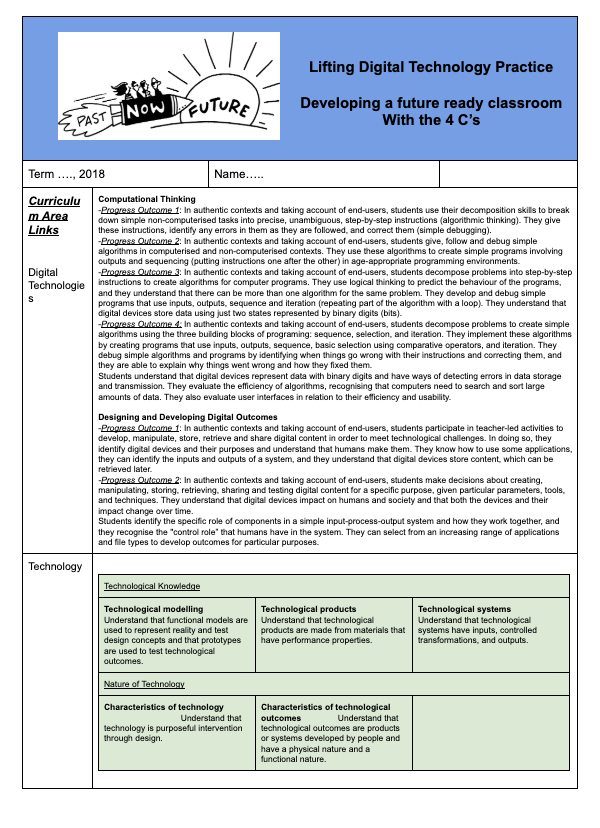
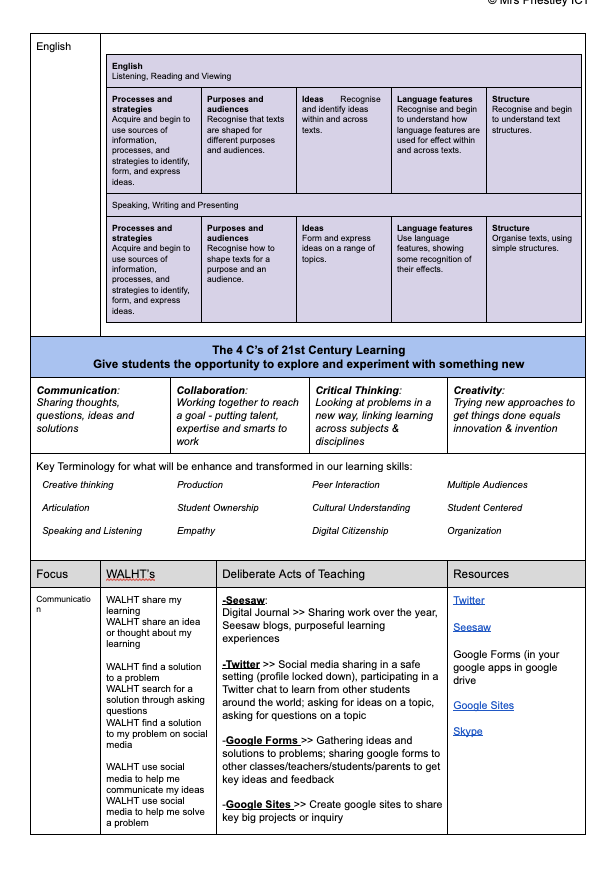
A few months ago I did a website post covering some key resources that I had created around using Digital Technologies within the junior school. I had created a LTP that covered teaching these skills with the senior school but hadn't got around to sharing it. So here we are. A more generic looking LTP that provides you with key ideas for creating future focused learners but using the 4 C's. A way of lifting digital technology practice in the classroom. The aim of this plan was to create ideas, links and draw attention to areas that linked to the 4C's that teachers might not have known or realised could link in. When talking to a few teachers, they were unsure what the 4C's were and how these could shape our students. This easily breaks down with key links, WALHTs and deliberate acts of teaching that could be used in the classroom.
Feel free to use this plan in your classroom or teaching practice. When sharing, please share the link to this post when sharing the links. Please do not recreate any of the information or planning you find - this plan was created by myself and full credit needs to be left at the top if in use. Wow. Where to begin! In this website post I will begin to share my journey from last week that highlights the incredible time I had in Sydney at the Google Innovators Academy. It was beyond amazing - words literally can not describe how fantastic it was! I will share all that I can - what I remember, what we did, how to get in...it all! The application: So to even get in you first need to submit your application with ideas around what a need or problem you see in your learning context. Mine was all around 'How can we create a programme to help teach key ICT and google skills to junior students. Of course going into the application, this is such a broad problem to have and they really make you unpack it once you're there. The application also consists of recommendations from current google innovators and also a serious amount of questions you need to answer to consider if you are the right fit. Check out my innovator application video below. Now before you even get there, you have work to do. Online meetings, discussions, goal setting and more! This sets the scene and helps you really unpack your problem and root cause. This was the best part, as it heightened your desire to want to be there and helped focus your mind on the task. What happened?: Arriving on the first day was so surreal! All you could see was keen and excited educators ready to get started on this journey together. Everyone was introducing themselves to each other, trying to remember everyones name and getting to meet people you had been talking to online in person. We scored some free Google swag which was amazing also - I used my Google backpack on my first day back at school today. Once we started, we had group challenges, group work and individual activities to complete in our time there. It was all targeted around our goal, technology or our journey that we were about to undergo. We were fortunate to listen to some amazing speakers that shared their expertise, knowledge and great feedback with us all. 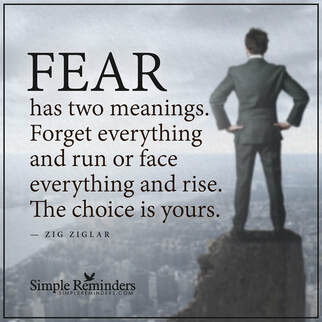 This great quote from a session done by a coach on fear. Fear in your classroom and fear as an educator. Our projects: We spent most of the time eating and drinking coffee. Which was definitely a highlight!! The unlimited food everywhere, and countless amazing places that Google actually had inside their buildings. Apart from the eating and drinking, we spent the other time working on our projects. This stemmed from our initial question or problem that we worked into our goal, project and end point that we wanted to create. My initial question ended up changing to: How might we remove teacher input totally and leave technology teaching up to students? This allowed me to explore what could really come from this project and open up new opportunities for me in this problem. I want to create something that all junior students would find beneficial and felt that this 'how might we' question would not be too broad or too specific. This helps it not be easily answered either along my project journey. My project has now been led down a new path - creating a series of technology themed picture books that target key ICT skills for students and teachers in a junior classroom. Definitely not what I thought I would create! Fingers crossed for the journey ahead! Other thoughts: Overall, 150% recommend applying if you are looking to meet some amazing educators from across the world that will make you think about and question everything you have done and will do in the future. I really can't summarise enough how though provoking it was; how much I have learnt about myself, my teaching, and my future; and what an amazing place Google is itself. The atmosphere they create while you are there is just such an incredible vibe - you really want to visit or go and work there. This amazing quote from Stuart Kelly really highlights what you should do and think about in the future. What should we keep doing? What should we stop doing? What should we start doing? - Stuart Kelly If you are interested in watching the livestream recording of our graduation, watch the Youtube video below! It will show you everyones project pitches including some quick snippet interviews with innovators at the event. I am specifically 25 minutes into the video if you are looking for my project pitch! If you are interested in applying then get onto it! You need to apply before the due date and to a cohort that is close to your area! I was fortunate that #SYD19 was was this year and close to my home - New Zealand.
Check out this Google site with all the information about the other innovators accepted and our application videos also. Have a question about my time there, the application or anything Google? Send me an email below.
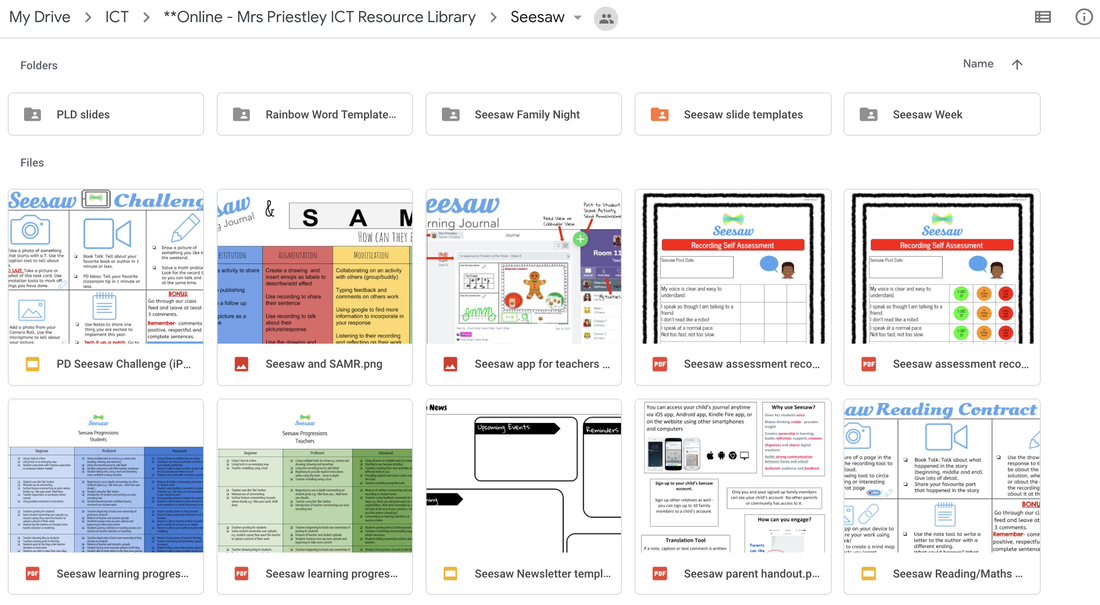
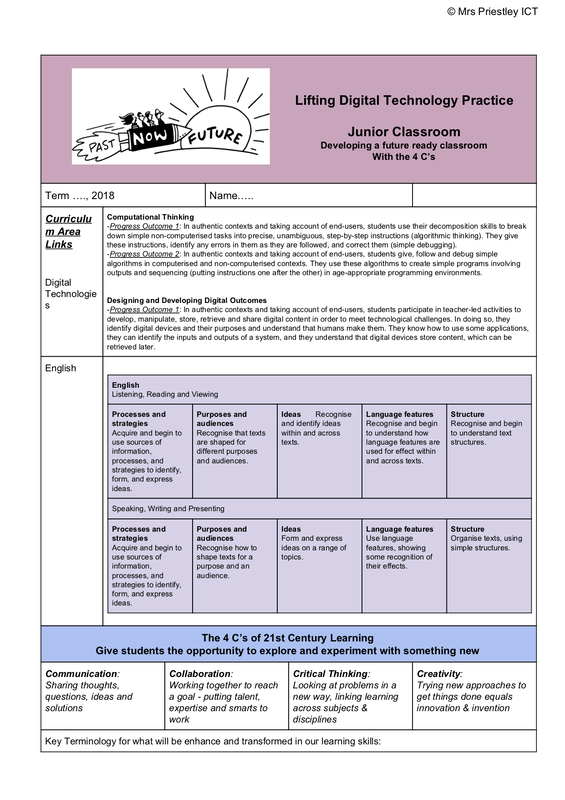
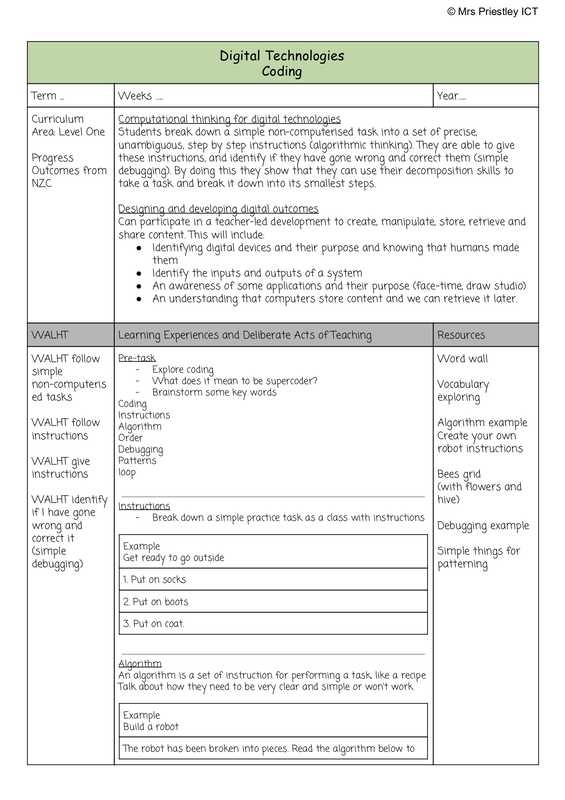
Last year I created this slide deck for a staff meeting in my Junior Team with a recording of it attached above. This is just a youtube of the slide deck if you prefer to listen rather than read. The slides show how easily you can break down those tricky key terms in your practice or classroom. Above are two plans that I created for my team also. The first plan is a junior devices ICT use LTP that provides ideas, tips and links to a range of things that can be taught in the classroom in all ICT areas. The second plan is a junior coding LTP that provides ideas, links and resources for teaching coding in a junior classroom. Both of these are in pdf form but can be moved into google docs form. Please do not share these files without permission - you are welcome to share the link to this post. Both of these were created by myself and full credit needs to be left at the top if in use. 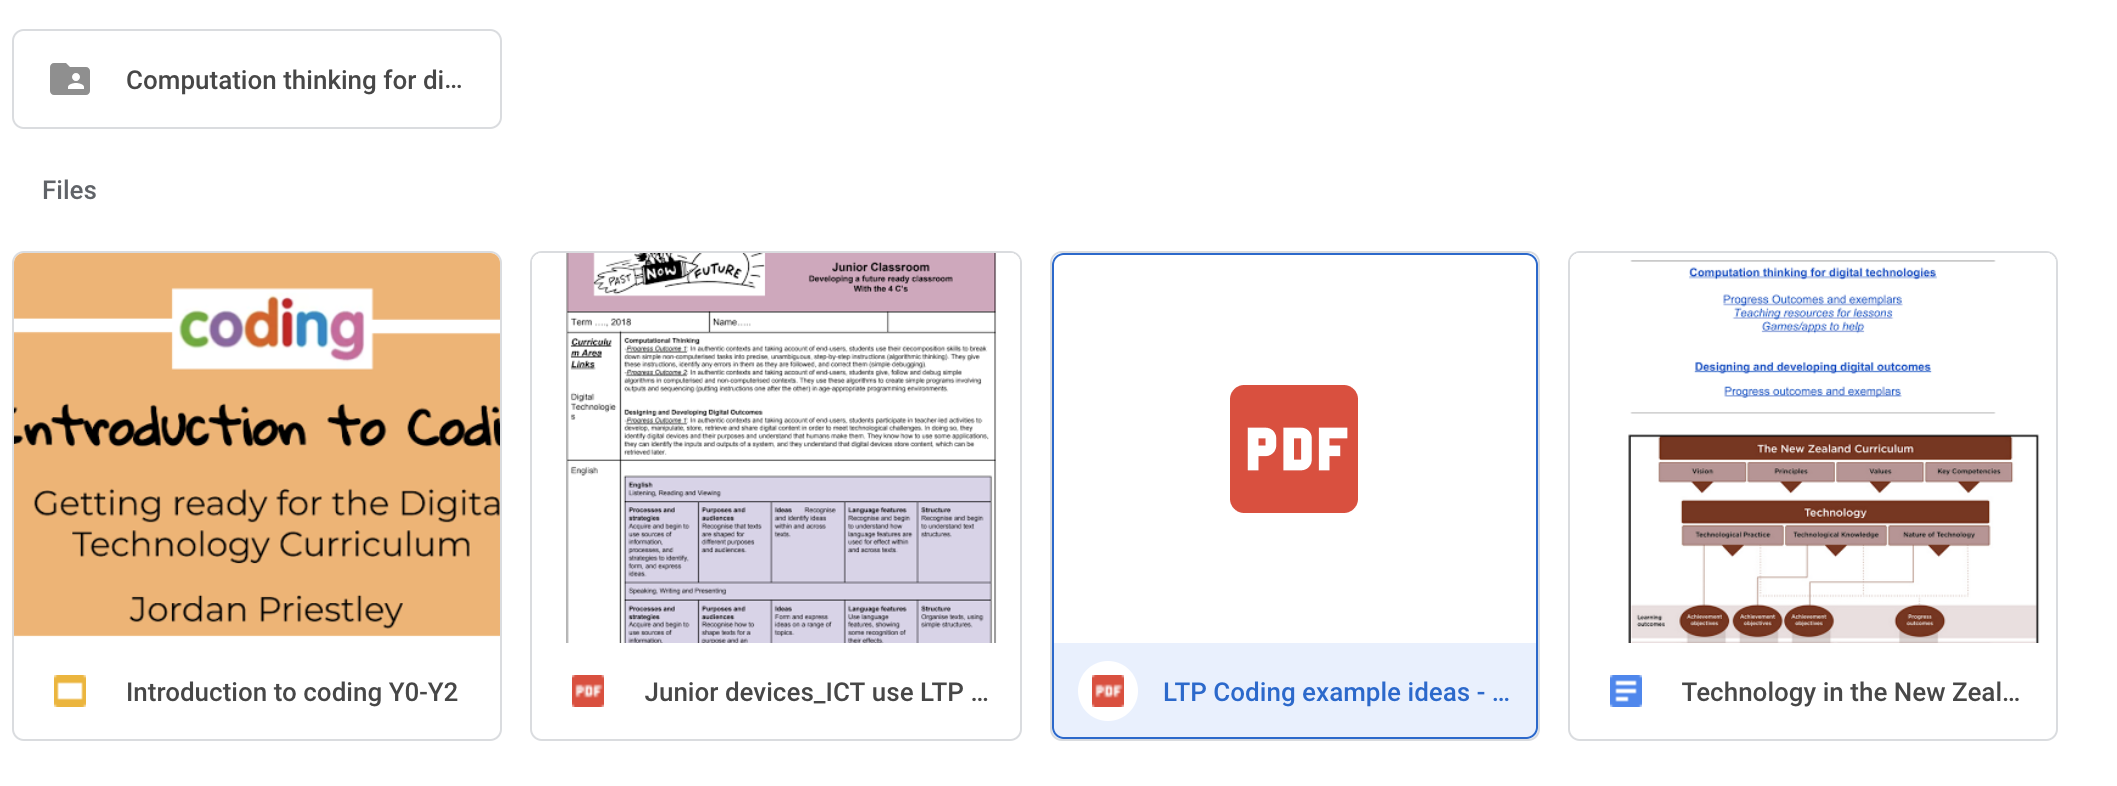 There are plenty of other resources available including more that I have created in this folder link (pictured above). These include specific examples to the Digital Technologies curriculum that can be used in your classroom.
When sharing, please share the link to this post when sharing the links. Please do not recreate any of the information or planning you find - both of these were created by myself and full credit needs to be left at the top if in use. |
AuthorMrs Priestley ICT blog is a place to read, download and view ideas! Archives
February 2024
Categories
All
|
|||||||||||||||||||||||||||||||||||||||||||||||||||||||||||||||||||||||||||||||||||||||||||||||||||


 RSS Feed